
Game Desciption
What is Live A Hero?
Live a hero was developed by the company Lifewonders, released as their 3rd mobile game (1st being Fantastic boyfriends and 2nd being Tokyo afterschool summoners) and launched at 30 september 2020.
Following it’s predecessors this game is a LGBT-positive game that features LGBT genres all in one place.
How Do I Download This Game?
If this is not possible for some reason, you must install QooApp onto your phone from here. Then, open QooApp and do a search for Lifewonders. Select Live A Hero and install.
Here is the translated home menu screen:

 Friend Point
At this point, you can start exploring other important concepts of this game:
- Gacha
- The main source of new heroes and sidekicks
- Battle
- Friend Support
- Borrow strong support units from other players to help you clear quests
- Training
- How to make your heroes and sidekicks stronger in battle
- In the early stage, beginners can mostly ignore Parallel Weapon, Blooming and Skill Tree Enhancement
- Quests
- Read scenarios and battle to earn rewards
- Mission, Login Bonus
Beginner Guide
General Tips
- This wiki is your friend, use it.
- This game has a low pull economy, so make sure to play everyday and get the daily
 Ether Crystal if you want to play long term and reach the 200 pull guarantee.
- If you don’t get your desired units on your first 10 pull, reroll your account and try again. It’s best to do this on Android/Emulator, where you can access the game files (additional application) and delete the userkey only for quick rerolls.
- There is a
 Permanent Ether Ticket available every week from the weekly quest store. It costs 500
 Star Shard, and you get 1000 Star Shard every week. Permanent Ether Ticket can only be used on the Permanent gacha, and is useful for building up your roster while saving pulls.
- Starting quests give you access to
 Pubraseer, a 3 star Healer that is serviceable, but likely to be replaced by another healer later on. There is also the
 ★5 Hero Exclusive Scouting Ticket, which lets you choose between five different 5 star heroes from early in the game’s lifespan. All of these heroes have access to Skill Trees (see: Upgrading Heroes), but are generally underpowered compared to modern heroes.
 Gomeisa is the recommended choice for his combination of healing and VP Gain, but if there’s a hero you like more from that selection then choose them.
- Limited banners have a consistent rerun schedule, if you miss a unit on their debut, don’t worry!
- Events rerun ~1 year after their debut, after that rerun they are added to the Anniversary rerun pool for 2 years. Finally, the banner is added to the Half-Anniversary rerun pool. This does not include random banners for Character Quest releases, Skill Trees, in person Events, etc.
- Main Quest banners are rerun when a new Chapter is released, but not on Anniversary events.
Upgrading Heroes
Newly summoned heroes start at level 1 and need to reach the level cap before upgrading them to the next rank. Easy sources of  EXP Item are the training quests, Event Stores, and gaining EXP Item from clearing quests.
In order to upgrade a hero’s rank, you need a certain amount of elemental Powerstones and medals. These can be earned from their respective elemental training quests, bought from event stores with event currency, or bought from the monthly store with  Livo.
Livo is the standard currency used to buy materials from the monthly store. It is passively obtained by clearing quests, but the most reliable source of it is from the Sales and Events Stores.
Sales is where you can send heroes (and later sidekicks) out to obtain character upgrade resources over time, even when you are not actively playing the game. In the early game, it’s recommended to set 2 of your sales to Livo and 1 on EXP Item or  Training Band (see: Upgrading Sidekicks). If you use paid stones, you can purchase a 4th slot, which can be used on whatever resource is needed more.
After obtaining Rank 6 and getting your hero to level 60, there is one final upgrade: Blooming. Blooming unlocks a third Sidekick Passive slot, which is important when optimizing endgame content. In order to Bloom a hero you need elemental Powerstones,  Dream Symbol (Events Store, Monthly Store, Challenge Simulator), and
 Astro Credit (Monthly Store). Obtaining all these resources takes a substantial amount of time and/or coin, so don’t worry if it’s slow going.
After Bloom, there are a few heroes who are then able to get a Skill Tree upgrade. The Skill Tree enhances that hero’s abilities and puts them closer/on par with modern heroes, but it requires a large amount of elemental Powerstones. Some upgrades are more impactful than others, like Ryekie’s Skill 2 upgrade giving him an second action after using his Skill 2 once, but the prority order is unique to each hero.
One of the last upgrades you’ll complete on a hero is their Parallel Level, which requires 1300  Parallel Quartz to reach P.Lv 100. Parallel Quartz can be obtained through Event Shops, the Challenge Simulator Shop, Exploring the Unknown, and SSS Challenge Quests (high difficulty, not recommended for early game). You can also clear the training quest for Parallel Quartz, but that is limited to 3 clears per day. After establishing a team of Level 50 or 60 heroes, it’s recommended to switch your Daily Quest tickets to the Parallel Quartz quests to get into the habit of farming the resource because it has a high impact on a hero’s stats and performance.
In the Monthly Coin Store there is the ability to purchase Parallel forms:
Base Design,
Attack Design,
Physical Design, and
Guard Design.
“Wuthering Merriment” Sterio and
Valoray.
Finally, there is Seal Level and Fan Count. Seal level is automatically applied to a hero when a duplicate is obtained. It gives a slight increase to a hero’s HP and Attack and decreases the VP cost of the hero’s skills. Fan Count is manually added through the “Gain Fans” tab in the Training Menu and increases the amount of VP generated by the hero. Both of these are optimizations and not at all necessary for standard play.
Upgrading Sidekicks
Sidekicks start at maximum bond level 50, which is also when a hero is able to use their Passive skills. In order to raise the maximum bond level up to 100 you need duplicates of the sidekick,  ☆3 Sidekick Heart or
 ☆4 Sidekick Heart to increase the maximum bond level.
Sidekick Hearts are obtained through the Record Cube Exchange.  Record Cube are obtained from Hero and Sidekick duplicates. 3 star Heroes/Sidekicks give 1 , 4 star give 5 , and 5 star Heroes give 20 .
- Hero Duplicates only increase fan count, so it is recommended to convert all 3 star Hero duplicates and any excess 3 star Sidekick duplicates into Record Cube.
- Additional hero upgrade materials are available in the Record Cube Exchange but should only be considered as a last resort due to the impact Sidekick upgrades have.
Sidekicks have five levels, and their Passive Skill increases in effectiveness with each level. The Sidekick’s Active Skill will upgrade upon reaching to level 60 and then again at level 100.
The Active Sidekick (Big Badge) also boosts the stats of the Hero they are equipped with. The most impactful stat is the speed stat provided, since that will play a part in determining speed order for the team (see: Team Building).
Quick list of Commonly Used Sidekick Passives:
- View Power:
 Melide,
 Yasuhiko,
 Yohack,
 Cerastium
- Attack:
 Senthak,
 Barte,
 Akashi,
 Sterio,
 Roiker
- Support:
 Exio,
 Orbiter,
 Ryusei,
 Pubraseer,
 Theoreol
- Speed:
 Ryekie (+5),
 Gammei (-5)
- Increase drop items:
 Huckle (EXP),
 Procy and
 Zaniah (Coin)
Note:
Quick list of Commonly Used Active Sidekick Skills
- View Power: Yasuhiko,
 Mokdai
- Attack:
 Saotome, Exio
- Buff: Huckle,
 Valoray,
 Okitaka
- Debuff:
 Tsuneaki,
 Kiloc,
 Flamier
- Speed:
 Farden,
 Grigory
Team Building
Heroes’ playstyles are separated into archetypes, and perform best in said archetypes (e.g.  Barrel = Combo, Ryekie = Speed).
List of current archetypes (as of 10/2026): Speed, Combo, Multihit, Damage over Time, Debuff, Hyperbuff, Emnity, View, Barrier
Teams are centered around a main DPS and their supports and/or sub-DPS in their archetype. Mixing archetypes is possible on certain units (see: The Exceptions) but generally not recommended.
Sidekicks are split between the Active (Big Badge) and the Passive (small icon), the Active and the Passive have different skills with Passive skills being generally higher impact than the Active skills.
Must-Have Passives on teams:
Turn order: you want the DPS as your slowest unit while all the supports go before to apply buffs, debuffs, and generate VP.
Turn order is determined by Speed, which includes the base speed stat of a hero and the speed stat of the active sidekick. There are two passives that affect the speed stat,
Archetype Overviews
Speed
Speed centers around increasing the speed of allies or decreasing the speed of enemies in order to deal more damage. This archetype experienced a revival upon the releases of  “Daybreak Harbinger” Vulpecula, one of the best DPS heroes in the game, and
 “Boundless Voyage” Huckle, a support that offers healing and debuffs to Speed teams. It also has the benefit of being easy to build, with
 Ryekie,
 Farden, and
 Reticul all performing well as budget options to support Speed DPS’s.
Example Units: “Daybreak Harbinger” Vulpecula,  “The Riptide” Andrew, “Boundless Voyage” Huckle,
 Santetsu, Ryekie, Farden
Combo
Combo centers around increasing the combo meter to increase damage dealt by your heroes. It is broken when the enemy attacks again, so it’s important to keep in mind how to quickly regain combo when your turn begins again. Modern Combo units have many different ways of building combo, along with certain thresholds that trigger attacks/buffs when reached.
Example Units:  “Urban Champion” Alend, “Wuthering Merriment” Sterio,
 Alphecca,
 Barrel,
 Ceph,
 Barte
Multihit
Multihit centers around attacking multiple times in one attack. These units are strong at applying debuffs because each damage instance is a new chance at inflicting them, or continue to apply them in the case of the Scar debuff. Modern multihit units come with debuffs built into their skills, making it easier to increase damage dealt to enemies.
Example Units:  Shiratori,
 “Majestic Gale” Gaius,
 “Starry Night” Monomasa,
 Yvaga, Valoray
Damage Over Time (DoT)
DoT centers around inflicting the Burst, Poison, or Burn debuff on your enemies, which deals damage at the end of that enemy’s turn. These units benefit from effects that increase damage per debuff, but suffer from having little to no budget options.
Example Units: Yohack,  ⇌Akashi,
 Theoreol, Senthak
Hyperbuff
Hyperbuff centers around putting all of the buffs on one unit. This often involves using FUA (follow-up action) effects to increase the number of attacks the main DPS can do in one turn, stacking buffs for one large attack, or a mix of both. This archetype is falling out of style as other archetypes outperform it in most content, but a modern DPS could swing things back in its favor.
Example Units:  “Wild Freedom” Sadayoshi,
 “Holy Frost” Gomeisa (with Skill Tree),
 “Moonlight Shadow” Nessen,
 Taika,
 “Guiding Oscillation” Astosis, Roiker
Debuff
Debuff centers around inflicting debuffs on the enemies in order to increase the damage dealt by the hero and their allies. Modern debuff units are more in line with DoT, but things could change in upcoming banner releases.
Example Units:  “Bulldozing Destroyer” Obsidius,
 “Lightning Blade” Kouki & Sirius,
 Norbrand, Barte, Grigory,
 Astar, Senthak
Emnity
Emnity centers around dealing high amounts of damage while at low HP. This is done by intentionally taking damage or using skills that deal Piercing Damage to the hero or allies. The main issues this archetype faces are it’s lack of budget options and it’s glaring weakness to DoT effects, which pierce through barriers that are used to buffer the low HP.
Example Units: 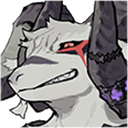 Vlaham,
 Moriyasu,
 Alend,
 Genji,
 Bygul,
 Ganran,
 Yotaro
View
View centers around manipulating view power to trigger FUA’s, Enhanced Attacks, buffs, and more. A new archetype, it boasts one of the strongest DPS units in the game by virtue of  “Unfaltering Devotion” Barrel's consistent FUA’s when view is gained or spent. F!Roudin provides a way to regain lost view at the start of the next turn, which pairs extremely well with
 “Brilliant Zenith” Roiker's summon consuming VP and converting it into ATK buffs at the end of turn. Even without his optimal teammates, “Unfaltering Devotion” Barrel is capable of clearing quests with the large amount of budget support options available.
Example Units: “Unfaltering Devotion” Barrel,  “Stellar Splendor” Roudin, “Brilliant Zenith” Roiker,
 Kalaski,
 Borealis
Barrier
The newest archetype in the game, Barrier centers around Thuban and his ability to perform FUA’s when receiving the Barrier buff and his ability to increase the duration and strength of existing barriers. Barrier itself scales off of the view stat and has some overlap with the View archetype, while Thuban himself benefits from certain Emnity effects because his Piercing Damage Skill 2 lowers the HP of himself and his teammates by converting the lost HP into a Barrier.
Example Units:  Thuban (Hero and SK),
 Loren, Alend
The Exceptions
These heroes, listed in release order, are unique in their flexibility and are able to fit into any team as needed. While they do benefit from being in their “home” archetype, it is not the only place they can succeed and thrive in.
- Theoreol
- A 4 star healer that applies Shift, one of the best healing effects in the game. Shift converts a portion of damage taken into healing, and pairs well with the Attack Down and Defense Up he applies with his skills. Should you ever need a healer, consider him.
 Sterio
- Sterio is unique in his ability to give buffs to an ally with his Skill 2 and Skill 3, and then inflict the Scar debuff on enemies. He continues to use his FUA as long as the ally continues attacking, piggybacking off of other FUA effects. His skill rotation is simple and repetitive, but extremely effective.
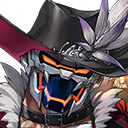 “Bardic Wanderlust” Danzo
- A Healer who’s better at dealing damage, He is unique in his ability to FUA after using his Skill 3 and gaining the unique buff, Voltage, which enables Pick Toss. Pick Toss has several noteable interactions, triggering after Sterio and “Boundless Voyage” Huckle FUA’s, allowing for increased damage and Scar stacks. His healing is effective as well, automatically healing allies at the start of their turn and also cleansing debuffs.
 “Roaring Storm” Hydoor
- A DPS who likes both speed and multihit effects, using them both to great success. He grants extra Attack and Speed to allies when recieving a Speed Up and gains the ability to act twice in one turn when a certain amount of hits have been dealt to enemies. His Skill 2 will activate again when Hydoor has Speed Up, making him scale very well with Scar debuffs.
- “Wuthering Merriment” Sterio
- A tank, combo unit, FUA enabler, and debuffer all in one. His strength is in his action economy, where he can use all three of his skills in one turn provided there is enough combo generated to provide enough Resonance stacks. His gauge also provides a stackable Attack buff that can ramp up quickly, along with having self-sustainable healing and debuff immunity. His Skill 3 triggers an FUA (2 FUA with resonance stacks) with allies’ Skill 1, on top of reducing enemy attack and inflicting Aim, a debuff that increases damage taken.
- “Guiding Oscillation” Astosis
- A lawyer lion in a bunny suit that singlehandedly changed the game. He is able to take two actions in one turn, using either his Skill 1 or Skill 2 before his most impactful skill, Skill 3. Skill 3 provides the Guidance buff, which automatically casts that ally’s Skill 2 on the start of their turn. This provides action economy to heroes who do not have access to it and enhances the action economy of those who do “Wuthering Merriment” Sterio, Ceph), allowing them to benefit from the additional damage or added buffs from a Skill 2 before their turn begins. One of the best users of this is
 “Star Insignia” Pubraseer, who receives an Attack buff from his Skill 2, which increases his Skill 3 damage when able to act again after Guidance is consumed. There are a few heroes that do not benefit from Guidance (
 “Wondrous Knight” Santetsu,
 Rokusei,
 Monomasa), but they can still benefit from the attack buffs that “Guiding Oscillation” Astosis provides with his other skills.
- “Brilliant Zenith” Roiker
- Making already powerful heroes even stronger, Roiker splashed onto the scene with great fanfare. “Brilliant Zenith” Roiker uses a new addition to the game, Summons, which act separate from the hero that summons them. Instead of being combat oriented like “The Riptide” Andrew, “Brilliant Zenith” Roiker's summon consumes extra View Power after your last hero acts, and when paired with “Unfaltering Devotion” Barrel, it can trigger multiple “Unfaltering Devotion” Barrel FUA’s and even fill his 12 attack gauge and trigger an extra attack. “Unfaltering Devotion” Barrel is not the only beneficiary of this, because the attack buffs provided from the summon are among the highest in the game. “Brilliant Zenith” Roiker is capable of generating a large amount of View power on his own, which means he can be inserted into most teams and support the DPS well.
- “Holy Frost” Gomeisa (Skill Tree)
- Revived by his skill tree, Gomeisa went from niche use to on par with “Wuthering Merriment” Sterio in tanking and support utility. “Holy Frost” Gomeisa provides a large amount of buffs to both himself and his allies to increase survivability, along with the ability to nullify debuffs to both himself and allies. On top of that, “Holy Frost” Gomeisa provides an attack buff that is charged by taking attacks and when allies recieve buffs, pairing very well with “Guiding Oscillation” Astosis to make almost any hero succeed in endgame content.
Keeping Your Account Safe
It is recommended to follow these steps to make it easier to recover your account in case you lose access to it.
Backing up your user key (Android user only)
userKey is the file that keeps your account data. If you lose access to the device where you play the game you can simply install the game on another device and copy the userKey to the game folder.
This means that making a copy of your userKey and keeping it somewhere safe is highly recommended.
You can find userKey on Android devices under /SD/Android/data/jp.co.lifewonders.liveahero/files/Data/.
For Android 11+, you may need to connect your phone to a computer and access app data folder from your computer.
How to Back-up Your Data
To create a transfer code data, simply start up the game, go past the title screen, and go to Options(オプション) on main menu.
Then hit Transfer Account (アカウント引継ぎ) at the second option from the top, Enter a password into both boxes of your choosing and hit the blue bottom right-most button.
Write down the Code it gives you AND the password you used.
When you’re ready or need to use it, start up the game. At the Title Screen, hit the bottom left button (Account Transfer/アカウント引継ぎ).
Enter the Code in the top box, and your custom password you made in the bottom box. Then hit the blue button.
NOTE: When you transfer your account to another device using this code, a new
userKeyfile will be created in this device and your account will be bound to this newuserKey, while the previoususerKeywill be become invalid. So remember to backup this newuserKeyafter transferring your data, as the previoususerKeywill be rendered useless.
Tips
If your team happens to die during a quest, do NOT use a stone to revive your party unless you’re absolutely desperate. You can just leave the battle and the stamina will be refunded.